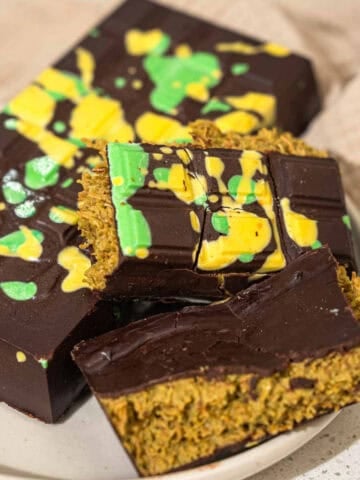
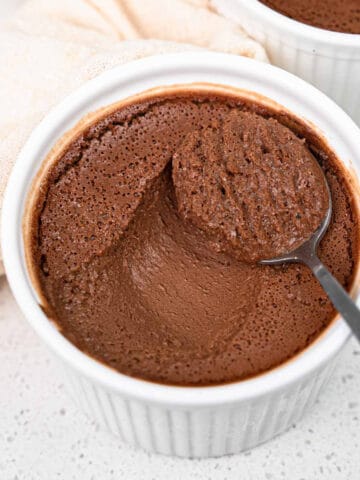
Learn how to make perfectly shiny and smooth chocolate, it's all in the tempering. This is your ultimate how to temper chocolate guide.
Jump to:
Why temper chocolate?
Tempering chocolate is an essential process in chocolate making because it influences the appearance, texture, and shelf life of chocolate products. Properly tempered chocolate exhibits a glossy sheen and a velvety texture.
Beyond the visuals tempered, chocolate offers a satisfying snap and a firm bite, elevating the eating experience for consumers. Not only that tempering stabilizes the cocoa butter within the chocolate, preventing unsightly blooming and ensuring long-lasting freshness.
Untempered chocolate is very hard to work with as it melts easily, and doesn't completely set. This makes it very hard to remove from molds or shape into different forms. On the other hand tempered chocolate contracts slightly as it sets, helping it release from molds easily and maintain clean and precise shapes.
There are a couple of ways to temper chocolate, but the two most common ways are either seeding or tabling.

What is the science behind tempering?
When tempering chocolate, we're primarily concerned with cocoa butter, which is a fat present in chocolate. Cocoa butter can form several types of crystal structures, but the key ones we focus on during tempering are known as cocoa butter crystals. These crystals have different properties that affect the texture and appearance of chocolate.
- Unstable Crystals: When chocolate is melted and then cooled without tempering, it can form unstable cocoa butter crystals. These crystals are not desirable as they result in chocolate that is soft, dull, and prone to melting at room temperature.
- Stable Crystals: Through the tempering process we form v type crystals, aka stable cocoa butter crystals. These crystals have a well-defined structure and give chocolate its desirable qualities such as a glossy appearance, smooth texture, and snap when broken. They also contribute to the chocolate's ability to contract slightly as it sets, making it easier to release from molds.
The goal of tempering is to encourage the formation of these stable cocoa butter crystals while preventing the formation of unstable ones. This is achieved by carefully controlling the temperature of the chocolate during the melting and cooling phases of the tempering process.
Tempering temperatures
When tempering chocolate, the most important thing is to watch specific temperatures. As long as you hit the right temperature at each stage of the tempering process it doesn't matter how you temper it. The tempering temperature ranges for the type of chocolate:
Dark chocolate are: initial melting (45-50°C), cooling (27-29°C), reheating (31-32°C).
Milk chocolate are: initial melting (45-50°C), cooling (27-29°C), reheating (30-32°C).
White chocolate are: initial melting (40-45°C), cooling (26-28°C), reheating (29-31°C).
Tabling method
Initial Melting
Place the chopped dark chocolate in a heatproof bowl. Set the bowl over a pot of simmering water, ensuring it doesn't touch the water. Stir frequently until melted. Or melt at 30 second intervals in the microwave.


Cooling the Chocolate
Pour about two-thirds of the melted chocolate onto a clean, cool marble or granite surface. Spread the chocolate out thinly using a spatula or palette knife.
Continuously spread and scrape the chocolate back together. This process helps to cool the chocolate and encourage the formation of stable cocoa butter crystals.
Monitor the temperature of the chocolate. Continue working the chocolate until it reaches the range of 27-29°C (80-84°F).


Reincorporate and Final Cooling
Once the chocolate on the table has cooled to the desired temperature, scrape it back into the bowl with the remaining melted chocolate. Stir gently to combine.
Continue to monitor the temperature of the chocolate. If it's too cold you can gently reheat it by placing the bowl over a pot of warm water.


Final Working Temperature
Once the combined chocolate reaches the range of 30-32°C (87-90°F), it's ready for use in molding or coating according to the recipe instructions.

Seeding Method
Chop the Dark Chocolate
Start by chopping your high-quality dark chocolate into small, uniform pieces. This ensures that it melts evenly and quickly.
Melt the Chocolate
Place about two-thirds of the chopped dark chocolate in a heatproof bowl. Make sure the bowl fits snugly over a pot of simmering water without touching the water. we are creating a double boiler.
Stir the chocolate frequently as it melts to ensure even heating.
Use a candy thermometer to monitor the temperature. Heat the chocolate until it reaches the range of 45-48°C (113-118°F). This is the melting point for dark chocolate.
Add Remaining Chocolate
Once the chocolate has melted to the desired temperature, remove it from the heat.
Add the remaining one-third of the chopped dark chocolate to the melted chocolate in the bowl. Stir gently until all the chocolate is completely melted.
This step helps to seed the melted chocolate with stable cocoa butter crystals from the unmelted chocolate, aiding in the tempering process.
Cool the Chocolate
Continue to stir the chocolate until its temperature decreases to the range of 27-29°C (80-84°F). Cooling the chocolate encourages the formation of stable cocoa butter crystals, which is essential for proper tempering.
Reheat Slightly (Optional)
If the chocolate hasn't fully melted during the seeding process or if it has cooled too much, you can gently reheat it by placing the bowl over the pot of simmering water for a few seconds at a time.
Be careful not to overheat the chocolate, as this can cause it to lose its temper.
Final Temperature Adjustment
Once the chocolate reaches the desired temperature range of 27-29°C (80-84°F), remove it from the heat source.
If necessary, gently reheat the chocolate until it reaches the final working temperature of 31-32°C (88-90°F). This ensures that the chocolate is in the proper temper for molding and coating.

How to check if your chocolate is tempered
Checking if your chocolate is properly tempered is crucial to ensure that it sets correctly and has the desired texture and appearance. Here's how you can check if your chocolate is tempered:
Visual Inspection
Look at the surface of the chocolate. Properly tempered chocolate will have a smooth, glossy appearance without any streaks or dull patches. It should reflect light evenly.
Touch Test
Gently touch the surface of the chocolate with your fingertip. Properly tempered chocolate will feel firm and dry to the touch. It should not feel sticky or tacky.
Snap Test
Break off a small piece of the chocolate. Properly tempered chocolate will produce a clean, sharp snap when broken. This indicates that the cocoa butter crystals have formed a stable structure.
Room Temperature Test
Spread a small amount of tempered chocolate onto a piece of parchment paper or a clean surface. Allow it to set at room temperature for a few minutes.
Properly tempered chocolate will set firm with a glossy finish. It should not appear streaky or have a dull surface.
How to use tempered chocolate
Once chocolate is tempered, it's ready to be used for various applications, such as coating, molding, dipping, or decorating. Here's how you can use tempered chocolate:
Coating
Dip fruits, nuts, cookies, or other treats into the tempered chocolate using a fork or dipping tool. Ensure the item is fully coated, then place it on a parchment-lined tray to set. The tempered chocolate will form a crisp, glossy coating around the item.
Molding
Pour tempered chocolate into molds to create chocolate bars, truffles, or other shapes. Tap the mold gently on the countertop to remove air bubbles, then allow the chocolate to set at room temperature or in the refrigerator until firm. Once set, carefully unmold the chocolates by gently flexing the mold or tapping it on the countertop.
Decorating
Transfer tempered chocolate to a piping bag fitted with a small round tip or a parchment cone. Use the chocolate to pipe designs onto cakes, cookies, or desserts. You can also drizzle tempered chocolate over finished desserts using a spoon or fork for a decorative touch.
Let's Get Cooking
With these tips you should be the master of tempering chocolate, get ready to make all the kinds of chocolate you can imagine.
If you liked this recipe make sure to leave me a comment and rating down below, I would love to know how you went.
Also, don't forget to tag me on Instagram @catherine.desserts and hashtag #cattycakes so I can see and share your desserts. Follow me on Facebook, Pinterest, Youtube, and TikTok for more of my baking creations and updates! Until next time... happy caking!
Print📖 Recipe
How to Temper Chocolate
Learn how to make perfectly shiny and smooth chocolate, it's all in the tempering. This is your ultimate how to temper chocolate guide.
Ingredients
- High quality couverture chocolate (dark, milk or white)
Instructions
- Start by chopping your dark chocolate into small pieces
- Place the chopped chocolate in a heatproof bowl. Set the bowl over a pot of simmering water, making sure the bottom of the bowl doesn't touch the water. Stir the chocolate frequently until it melts, then use a candy thermometer to check when it reaches 45-48C (113-118°F)
- Remove from the heat and add the remaining one-third of the chopped chocolate to the melted chocolate and stir gently until it's completely melted.
- Continue to stir the chocolate until to reaches 27-29C (80-84F)
- Place the bowl and gently reheat until it reaches 31-32C (88-90F)
- Remove from the heat, no the chocolate is temperated and ready to be used (To check take a small bit of chocolate on a piece of parchment paper and let it set at room temperature for a few minutes. It should be set firm.
- The chocolate is now ready to be used
If using milk chocolate use these temperatures: initial melting (45-50°C), cooling (27-29°C), reheating (30-32°C).
If using white chocolate use these temperatures: initial melting (40-45°C), cooling (26-28°C), reheating (29-31°C).


Comments
No Comments