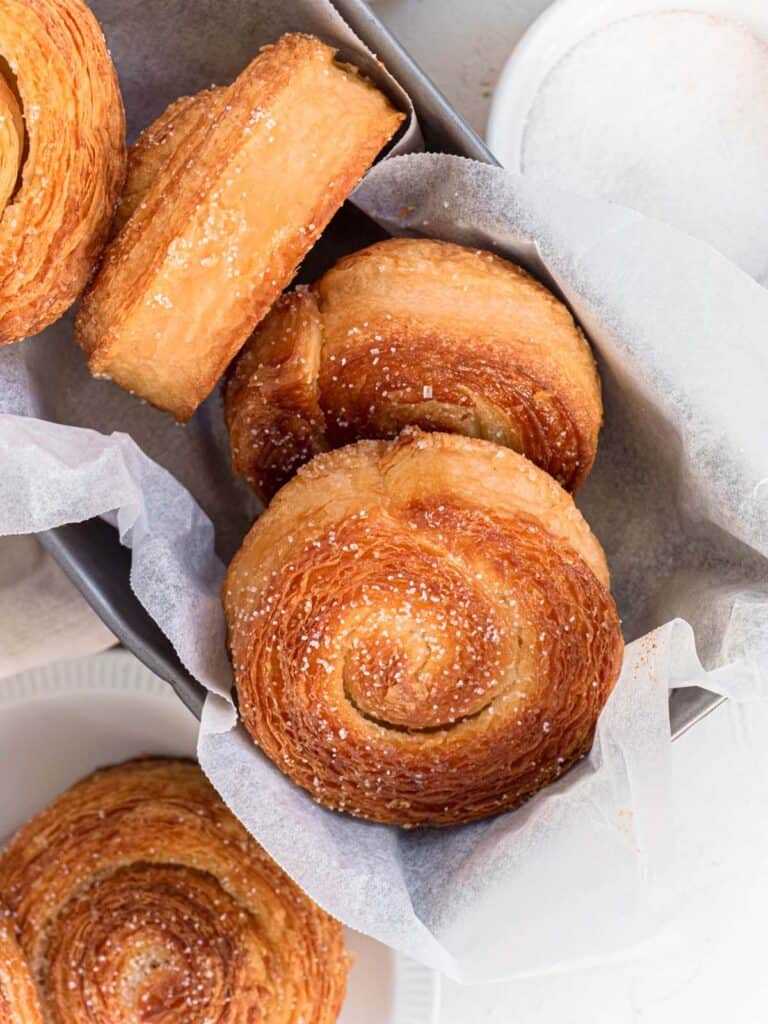
A cross between a croissant and a muffin. These cruffins have a crisp and flaky exterior with a soft and buttery interior swirled with cinnamon sugar. What else could you ask for?
The cruffin craze started a couple of years ago following the appearance of cronuts (which I absolutely love, but are so bad for you...). I honestly didn't think much of cruffins, because unlike cronuts they aren't deep fried to crispy perfection, they are just croissants baked in a muffin tin. That was until I tried one 😍
The reason why this cruffin was amazing was because #1 it was filled with caramel #2 the top of the cruffin (or would you call it a cruffin top) was extra crispy, flaky and delicious. That rolled in cinnamon sugar and omg... heaven.
Thus the birth of these cruffins. My croissant dough recipe has been a work of progress for quite a while. When making croissants you need to reach a balance of buttery goodness and light fluffiness. A good croissant should feel like eating a crispy, flaky cloud. And eating it should be an absolute mess. My traditional croissant recipe will be coming soon, but let's call these cruffins an introduction into my world of laminated pastries.
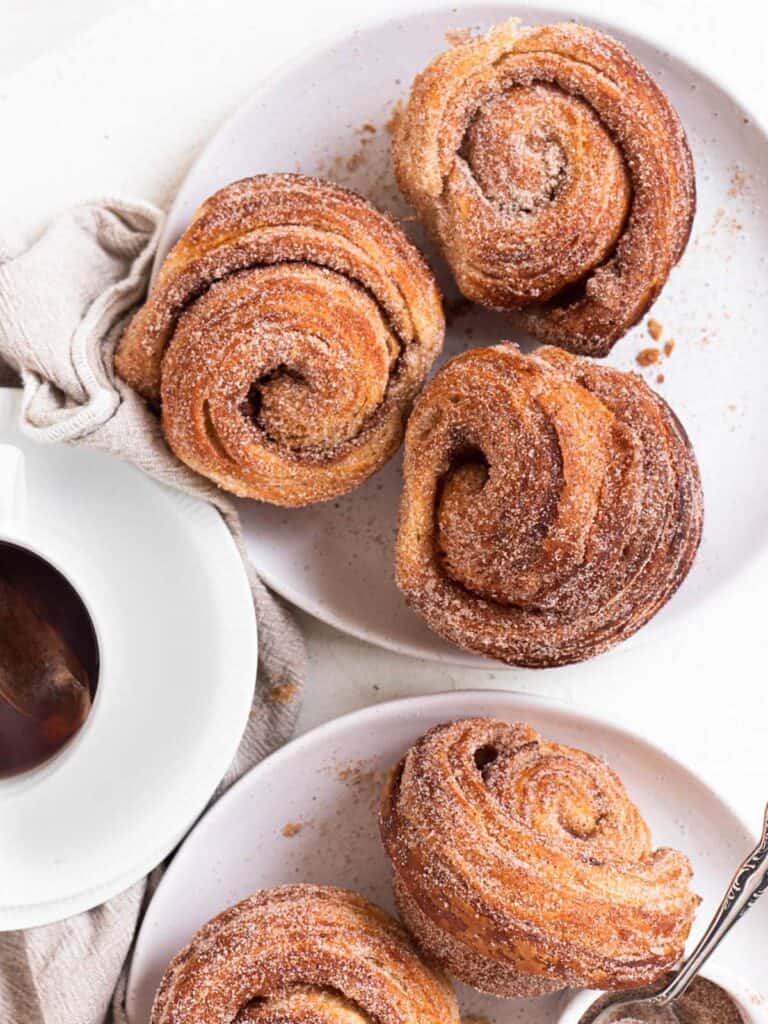
Why Cruffins?
Making cruffins is a great way to be introduced into the world of laminated pastries. As they are baked in a muffin mould there is not much attention placed on the rolling and shaping of the pastry. An uneven roll or wonky shaping can even give your cruffin unique character 😉. This gives you more time to focus on the important process i.e. lamination.
On top of that the 'cruffin top' allows for the pastry to open up a little more and create a beautifully flaky experience.
What is Lamination?
Lamination is the process of rolling butter in between dough to form increasingly thin alternating layers of dough and butter. Doughs that are made by rolling butter in between layers are known as laminated doughs. Common examples would be puff pastry, croissants, danishes, etc.. Rolling butter in between the layers of dough will give the characteristic flaky texture that makes them absolutely delicious!
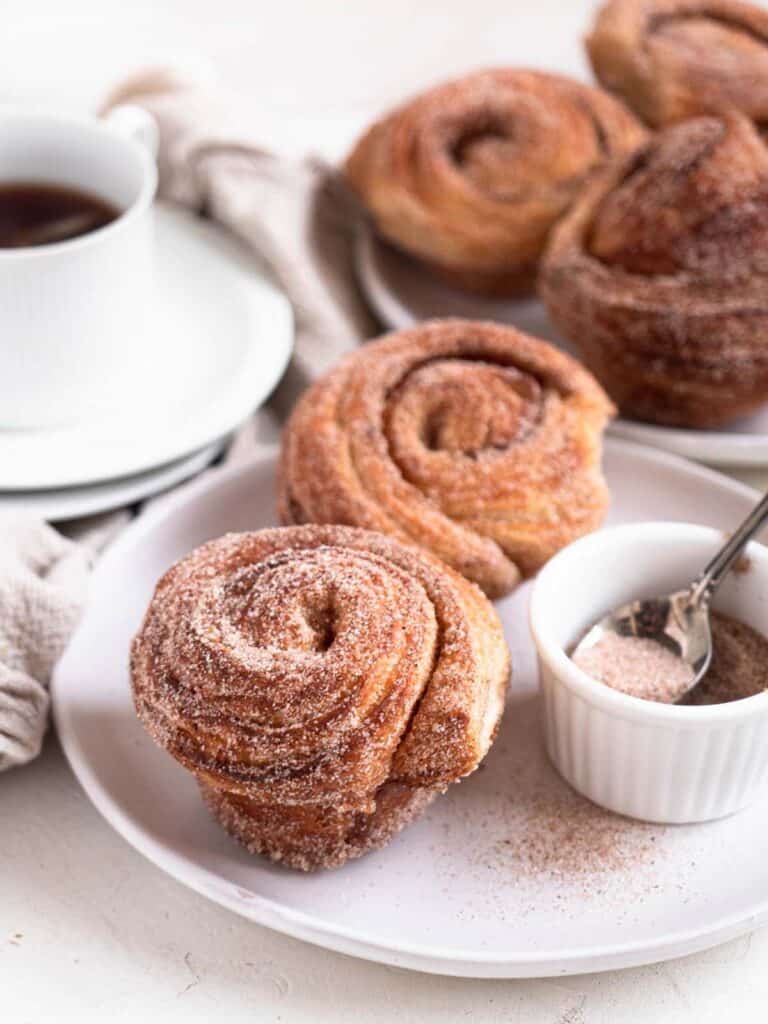
Detail into the components
The dough
The first step is to make the dough. When I make the dough there are a couple of key points to keep in mind.
Knead until supple, but not completely smooth
If you have made bread before you would know that doughs should be kneaded until they can pass the 'windowpane test'. This is the stage when the dough can form such a thin sheet that it is translucent to light, like a window. This indicates that a good amount of gluten has formed (the essential network for all bread to rise)!
When making croissant dough we want knead until just before this stage. If we develop too much gluten it will make the folding process more difficult. Gluten gives the dough elasticity, and the more gluten that has formed the more spring back the dough will give when you're trying to roll it out.
When kneading the dough it will be very rough at first. As the dough starts to come together add the butter and knead for 10 minutes. At this point the dough will be much softer, slightly elastic, but the surface won't be 100% smooth. That's exactly what you want!
Rest overnight
It is important to let your dough rest overnight for a couple of reasons. First it allows the dough to proof. Second it develops flavour. And third it lets the gluten networks that you formed while kneading to relax, that way when you roll it out to enclose your butter it won't try and resist you.
The Butter
The most important ingredient... butter! The butter in between layers of dough creates the characteristic flakiness. So, it is important that you choose a high quality butter!
Low quality butter contain more water, which can decrease the amount of flakiness you get from your pastry.
Most bakeries will use butters with a minimum of 85% milk fat, however when buying butter from your supermarket you may not have as many options. I wouldn't go below a minimum of 80% milk fat in your butter.
Making the butter block
When is comes to making croissants the most important steps are the layering of butter and dough. In order to make this process as easy as possible it important to optimise your ingredients. By shaping your butter into a flat rectangle it will make the rolling out process so much easier. A couple of tips to help you form the perfect slab of butter.
- Fold a piece of baking paper into the rectangular shape you want to achieve. I rolled my butter to a 20cm x 15cm rectangle, so I would make a rectangle that is 20cm x 15cm. Make sure the baking paper can be folded over to enclose the butter
- Use softened butter, this will let you roll it out into the shape of the baking paper with less effort
- Once rolled refrigerate until just set. I chill mine for 30-45 minutes. If it is too hard it will be impossible to roll out.
The Folding Process
Making laminated doughs can seem very intimidating at first, but once you nail the basic process you'll be pumping out your own pastries in no time!
Different people have different ways of folding their dough.
I go for three folds:
- Enclose the butter
- Single fold
- Double fold
- Single fold
Enclosing the butter
There are a couple of different ways to enclose the butter. I find the easiest way is to enclose the butter like an envelope. Place the rectangle of butter diagonally on your rolled out dough. The corners of the butter should just touch the edges of the dough sheet. Then fold each corner of the dough down towards the centre of the butter slab. The edges of the dough should join in the centre of the butter and you can then pinch the edges together to enclose the butter.

Single fold
Single folds are the easiest. Simply roll your dough out into a rectangle and visually divide the sheet into thirds. Fold the bottom third up, then the top third down. Easy!

Double fold
Double folds, also known as book folds are a little more challenging. After rolling the dough out visually divide the sheet into fourths. Fold each side towards the centre line. Then fold that in half. This is also called a book fold because it looks like a book!

Assembly
The fun part! Once you have completed all your folds and allowed the dough to rest for an hour in the fridge it's time to roll it out. Roll it out at evenly as possible into a rectangle. This recipe makes 10 cruffins so I rolled it out into a 40cm x 25cm rectangle. I then cut it into strips of 4cm in width.
Then roll them up! I like to roll them a little unevenly so the middle of the roll is slightly protruding. This will give more of a muffin shape with baked in the oven.
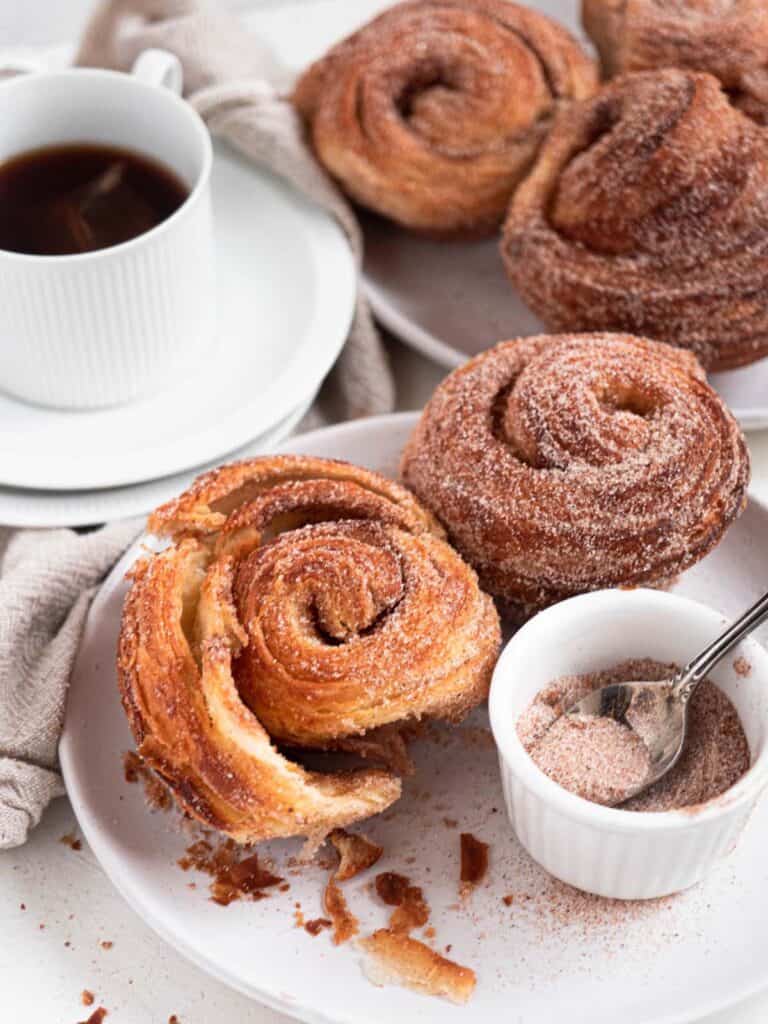
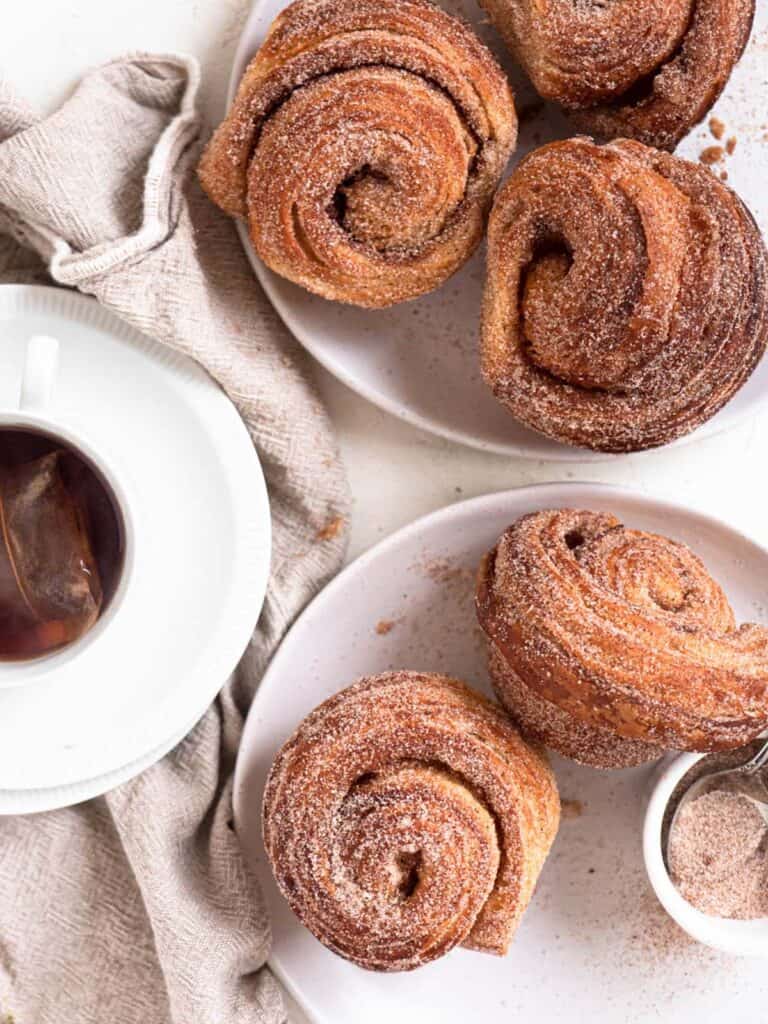
Let's Get Baking!
I know that making croissant dough can be intimidating so I tried to make this blog post as informative as possible. There are quite a few steps but with the illustrations and tips I hope it streamlines the process. You honestly will get the best cruffins of your life!
If you liked this recipe make sure to leave me a comment and rating down below, I would love to know how you went.
Also, don't forget to tag me on Instagram @catherine.desserts and hashtag #cattycakes so I can see and share your desserts. Follow me on Facebook, Pinterest, Youtube, and TikTok for more of my baking creations and updates! Until next time... happy baking!
PrintCinnamon Cruffins
Croissant dough baked as a muffin with a cinnamon swirl, rolled in cinnamon sugar. Crisp, flaky pastry with a buttery and fluffy interior. The perfect way to start your morning!
- Prep Time: 120 minutes
- Cook Time: 20 minutes
- Total Time: 2 hours 20 minutes
- Yield: 10 1x
- Category: Bread
- Method: Advanced
- Cuisine: French
Ingredients
Dough
- 500g Bread flour (3 ¾ cup)
- 55g White sugar (¼ cup)
- 5g Salt (1 ½ tsp)
- 130g Water (½ cup 2 tsp)
- 130g Whole milk (½ cup)
- 50g Unsalted butter (I), softened (¼ cup)
- 10g Instant yeast (2 ¼ tsp)
Butter Block
- 250g Unsalted butter (II), softened (1 cup 2 tbsp)
Cinnamon Sugar
- 200g White sugar (1 cup)
- 1 tbsp Ground cinnamon
Assembly
- 20g Unsalted butter, melted (1 ½ tbs)
Instructions
Dough
- Combine flour, sugar, salt and yeast in the bowl of a stand mixer fitted with a dough hook, mix to combine
- Add water and milk to the flour mix on low until the dough comes together into a rough ball
- Add the butter, increase speed to medium-high and continue to mix for 10 minutes
- The dough should be smoother and more elastic, but not completely smooth
- Remove dough, grease bowl and cover with cling wrap
- Place in the fridge to proof overnight, or a minimum of 6 hours
Butter Block
- Fold a large sheet of baking paper into a 20 x 15cm rectangle
- Add the butter to the centre of the baking paper and fold up the rectangle to enclose the butter
- Using a rolling pin roll the butter into the shape of the baking paper, making sure to get into the corners as well
- Place the butter in the fridge to set for 30-45 minutes. The butter should be chilled and firm, but not rock solid
Cinnamon Sugar
- Add sugar and cinnamon to a bowl, whisk to combine
Assembly
- Remove your dough from the fridge and roll out into a rectangle that will enclose your butter block (see illustrated image above)
- Fold the corners of the dough in and pinch the edges to fully enclose the butter in the dough
- Flip the dough so the edges face the benchtop and roll the dough out into a 20 x 60cm rectangle
- Flip the dough over again so the edges face up and perform a single fold by visually dividing the dough into thirds and folding the top and bottom third into the centre (see illustration above)
- Cover in cling wrap and place in the fridge for 20 minutes
- Remove from fridge and roll out into a 20 x 60cm rectangle
- Perform a double fold by visually dividing the dough into fourths and folding the top and bottom forth towards the centre line, then fold in half (see illustration above)
- Cover in cling wrap and place in the fridge for 20 minutes
- Remove from fridge and roll into a 20 x 60 cm rectangle
- Perform a single fold again (see step 4)
- Cover in cling wrap and place in the fridge for 45 minutes
- Grease 10 holes of a muffin/cupcake tray
- Remove from fridge and roll into a 25 x 40cm rectangle
- Brush the dough with melted butter
- Sprinkle with ⅓rd of the cinnamon sugar, pressing the sugar into the dough
- Trim the edges, then cut the dough into ten 4cm strips
- Roll them into swirls
- Place each swirl into a cavity and cover the tray loosely with cling wrap
- Leave at room temperature to proof for 1-2 hours, until puffy and 1.5X in size (the layers will begin to separate)
- Preheat the oven to 190C / 375F
- Bake the cruffins for 18-20 minutes, until puffed and golden brown
- Remove from oven and unmould (I use a fork to pull them out of the tray)
- Immediately roll in the cinnamon sugar
- Enjoy!
Notes
These taste best freshly baked as they are crisp on the outside and fluffy on the inside. If enjoying once cooled pop them in an oven at 200C / 390F for 10 minutes, or an airfryer!




Caitlin
Would love a YouTube video going over this technique!! Seems a bit daunting without a visual. Thank you for all that you do ❤️
Catherine Zhang
Hi Caitlin, Definitely a lot of steps! I'm considering making a video going over the dough technique to make it a little easier to understand. I hope the illustrations make it a little easier if you do make them now 🙂
Chris
This dough is really nice to work with. My only issue is that mine took way longer to bake than the time you have here and they got dark on top but still a little raw on the inside. I think I also let them rise too big. Definitely going to try these again.
Catherine Zhang
Hi Chris! Hope it goes well the second time around. It sounds like your oven runs a little hotter than normal seeing as the outside baked so much quicker than the inside. I would recommend turning down your oven temperature by 10-20 degrees and baking it a little longer. You can check whether the cruffins have fully proofed by poking them. If it bounces back while leaving a small imprint it's ready to be baked 🥰 Hope these small tips help!
AliGirl
Yes, please! In addition to the drawings/illustrations, a video would be great, thank you! 🙂
Chris
They sound delicious; I have to try these!
One suggestion: include Fahrenheit temperatures because that's what we use in the US.
Catherine Zhang
Hi Chris, Thank you! I usually do but I must've forgotten with all the other things on this post. Updated it with fahrenheit!
Jen
I loooooove croissants 😍These sounds incredible with cinnamon. Thank you for your detailed explanation!
Susie
I would LOVE to make these for family when they come to visit BUT this is a bit labor intensive. Can the dough be refrigerated overnight once it is ready to bake such as would I be able to make them to the point of ready for the oven then refrigerate then the next morning take them out to rise in the pan and bake?
Catherine Zhang
Hi Susie,
Yes the dough can definitely be refrigerated overnight once they have been rolled into swirls. Let them come to room temperature for about an 45 minutes to an hour before baking!
Kelly
If refrigerating overnight, do you let the swirls rise 1.5-2 hours in the muffin tins before placing in the refrigerator, or let them rise the next morning? Thanks!
P.S. Made these this weekend and they are amazing!
Catherine Zhang
I like to let them rise the next morning as they will have a slow rise in the fridge overnight as well. So glad you loved them, can't go wrong with flaky pastry 🥳
Nina
A process but turned out great!!!
Catherine Zhang
It's a process but so rewarding in the end!
Cecilia Anderson
Très bien
Catherine Zhang
Thank you!
Charlotte
Hi, LOVE this recipe, the last batch i made I froze them after baking them however they were a bit dry when heating them up after freezing. Would it work to freeze the dough before it bakes and then what tips would you have for defrosting and baking? I cant eat this many before they go stale and nice to have some in the freezer!
Catherine Zhang
Personally, I haven't ever frozen them before baking. I'd say freeze them right after you've rolled them. Then when you're ready to bake take them out to defrost and proof them until almost doubled in size and bake. Hope that helps!
Melody
I make croissants, and I usually shape them and then put them on a cookie sheet to freeze. Once they’re frozen, I toss them in a Ziploc bag. When I’m ready to bake them, I take them out of the freezer the night before, and put them on a parchment lined cookiesheet. I put the cookie sheet inside a plastic bag and then it goes in the refrigerator overnight to thaw. The next morning, I leave them in the plastic bag, but put them in a warm place to raise. It usually takes about two hours, but I raise them until they look right. Then I bake. Works perfectly. I suspect it will work the same with these.